Category Archives: Home Decor

Round Patio Tablecloth with tassel trim

round tablecloth

Round is not such a difficult option for a patio table. Really it’s just a matter of trimming your fabric and sewing in a hem … of course, it will be a long hem, but worth the trouble!

unfinished tablecloth

Before: A square tablecloth is ok for a round patio table, but I wanted a neater look.

Cut a quick circle: Fold twice and draw a curved edge

Fold a big square of fabric in quarters and mark an arc along raw edges from centre point out. You can cut thru all layers at once if the textile is not too thick.

add tassel trim

Open up the circle, and hem up with tassel trim. It took 4 yards of trim to get around this 62″ wide tablecloth. I ironed a hem up and pinned the trim all around in place. The first pass of stitching caught the upper edge of trim and the raw edge of fabric. The second pass caught the low (tassel) edge of trim and the fold edge of fabric.

Widen a Narrow Bolt of Fabric with a side panel

In order to get a decent hang-down off my 48″ patio table, I needed to add an 8″ panel to the side of my 54″ blue checked fabric.

I added the panel using a flat fell seam, so both sides looked finished. (The panel is small checks.)

I added the panel using a flat fell seam, so both sides looked finished. (The panel is small checks.)

Amount fabric required:  

Tablecloth fabric:  2 yds

Tassel Trim: (for 48″ table) – 4 yds

How about a hole for the umbrella?

That will require some sort of a slit and an overlap. Next project.

Next tablecloth will need a centre opening for my patio umbrella

Next tablecloth will need a centre opening for my patio umbrella

Quilted couch pad slipcover

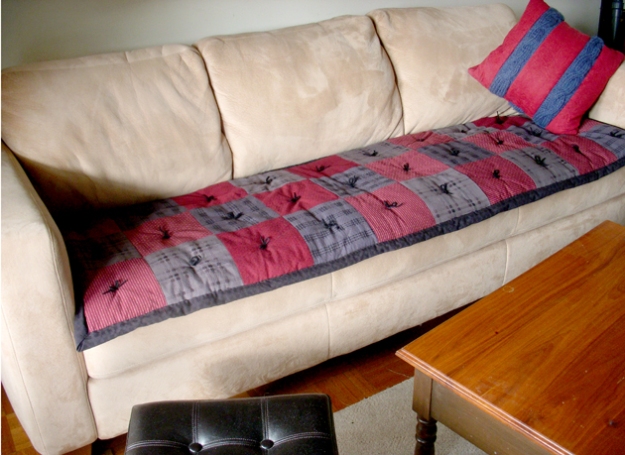
How about this checkerboard seating for a living room couch?

Protecting the seat only, it’s a happy harmony of slipcover and quilt. And that’s a good place on the sofa-coverings spectrum. Every fitted slipcover I’ve ever attempted looked sloppy and rumpled even before a movie and popcorn night. And the alternative, a precision perfect quilt, seemed work too fine to be parking my tush on.

couch quilt

Dark colours on this quilted couch pad contrast with the light tan sofa fabric. A simple nine-patch design is created with two red tones and two grey tones. Randomly alternated and yarn-tufted, the result is an overall vintage look.

Previously, coverlets folded in half were too short at the ends and too wide to the back. Now my red and black cover is custom fit from armrests to cushioned back. Blocks are seven inches square. There are three rows of ten across, for a total of 30 squares.

quilt sandwich

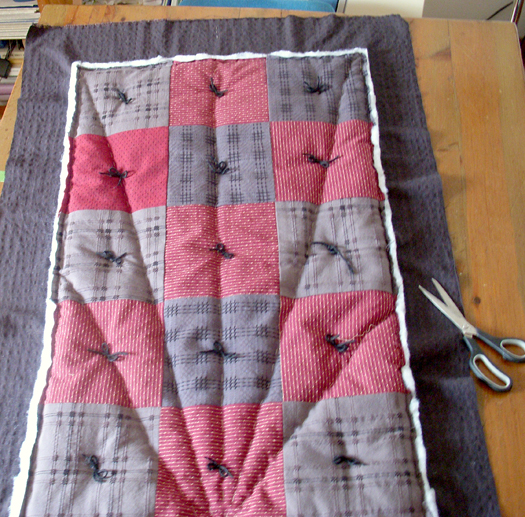
Stacking order: First the backing is taped flat on a large table. Next, the batting is laid down. (Here I’ve used two layers to add loft). Then, the assembled patchwork is placed on top. The bundle is machine sewn all around the edge.

centre marks

Before you stack, mark the exact centre of the backing on all four sides. Do the same on the pieced top. When you prepare to sandwich the layers, be sure to line the marks up perfectly.

tufted quilt

Here the layers have been basted in a sunburst pattern to keep everything taut and flat. I believe the same success could be achieved with curved safety pins available at most good quilting stores. The centre of each of the 30 blocks is tufted with yarn.

trim batting

The batting is trimmed 3/8″ to the machined stitch line, and the excess backing (roughly 4 inches all around) is ready to be folded to the front for a mock blanket edging.

Amount fabric required for three seat couch coverlet:  

Do choose fabrics that will wash well. No need to pre-wash the batting.

Backing: 2.2 metres of black broadcloth or similar from a 45″ bolt

Pieced top = 30 squares: 2 metres total

1/2 metre each: dark grey, black, deep red, red with small pattern.

And black yarn for tufting.

Always have a certified nap professional (I use a standard housecat)test your quilted sofa slipcover pad when finished.

Always have a certified nap professional test your quilted sofa slipcover when finished. (I use a standard housecat.)

Jacob’s Ladder Wall Quilt

Image

I sprinkled in a few green squares for interest and flipped the light/dark order at bottom as a nod to imperfection.

Jacob’s Ladder packs a graphic punch in monotone, the light and dark squares advance and recede in a classic, crooked zig-zag.

The simple pattern is a great choice for a novice like me. All I had to do was arrange my two-inch squares and four-inch triangles in the correct sequence to create the ladder.

Image

I got my instructions for this 20″ x 20″ quilt sample from Marilyn Walker’s book Ontario Heritage Quilts, which I enjoyed for her tribute to talented early quilters and for the imaginative photographs. Good tips on piecing are included at the back.

I chose to hand quilt, which requires patience and commitment.

Image

For future generations, include a patch on the back with the name of the quilter, the year it was completed and the pattern used.

Image

Before your first quilt is finished, you will be planning the colours for the next.

Hand stitches create a delicate broken line of thread, much softer in appearance than the precision of a machine stitch (see upper right diamond in photo).

I plan to hang my finished square on the staircase wall. All who ascend and descend can imagine moving between the up-down-up steps of Jacob’s ladder.

Amount fabric required:  

  • One half yard burgundy
  • One half yard white.
  • Batting  to fit 20″ x 20″
  • One yard broadcloth for backing, which is wrapped around the edges to form mock binding.

New Corduroy Cover for Curved Rocking Chair

Ahhhh! The curved rocker cover in corduroy is finished and looking very inviting. Re-covering the steel frame chair was indeed a lengthy project from start to finish. A virtual marathon of stitching (43 feet in total) was required, and a couple of serious sessions spent fine-tuning a perfectly snug fit. But all worthwhile in my opinion. Continue reading

Hi-contrast Frill Pillow

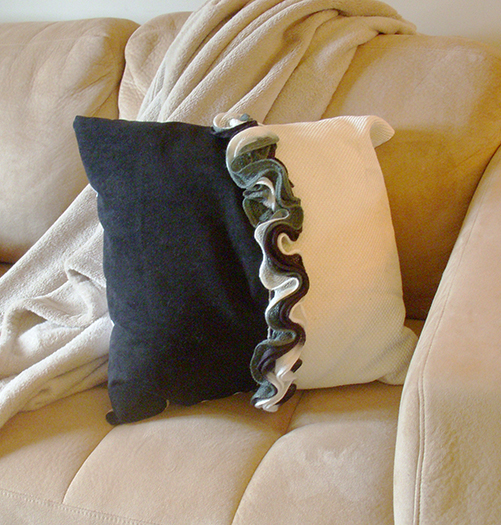
Want a bold accent to liven up a neutral zone? A block of black-and-white adds impact. Here’s an easy to make pillow that brings in some zing.

The opening of the pillow is hidden under a wavy knit frill. I used a variegated net yarn with soft grey swirls blending into dark and light extremes.

This simple-to-make pillow features a mesh knit frill running up the centre. The front panels overlap to allow easy insertion of pillow form.

This simple-to-make pillow features a mesh knit frill running up the centre. The front panels overlap to allow easy insertion of pillow form.

Continue reading

Make a Muslin Slipcover for Curved Rocker

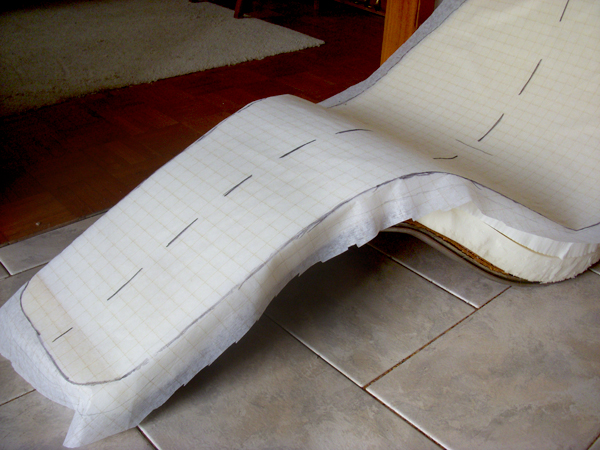
Fresh foam slabs have been glued to the curved rocker frame. Now I want to test the slip-cover pattern I outlined from the original corduroy.

Fabric shops sell pattern paper or interfacing with grid marks. Use a thick black marker to outline the chair cover sections and then add a good 3/4 inch for seam allowances.

Fabric shops sell pattern paper or interfacing with grid marks. Use a thick black marker to outline the chair cover sections and then add a good 3/4 inch for seam allowances.

Continue reading

Replace foam on old curved rocker

A once lovely 1970’s era curved rocker is tattered inside and out, with hopelessly limp, cracked and crumbling padding. It’s high time for some replacement foam and fresh upholstery.

Let’s tackle the cushion support first. We’ll need to cut two layers of foam that will overlap along the back and seat. That’s where we want extra cushioning. To duplicate construction, we can use two-inch thick foam. Continue reading

Tote bag from half yard remnant

Don’t overlook the remnant bin when shopping at your favourite fabric outlet. Here are pattern pieces cut from a half yard of graphic canvas I plucked from stock ends.

Here in Toronto we pay five cents if we need a plastic bag, and since my re-usable cloth grocery bag was getting unsightly, I planned to use the black and white circles and stripes to make a new one. Continue reading